
Authentication with Hilla
Hilla is a full-stack web framework from Vaadin. In the backend, Spring Boot is used together with Java. In the frontend, TypeScript is used with either React or Lit. To me, Hilla is an excellent choice for the development of business web apps.
Authentication plays a very important role for web apps in a corporate context. Users must authenticate themselves to a web app and then work in the context of certain authorizations, which are usually expressed by roles.
Fortunately, Hilla supports many different authentication mechanisms, as it relies on Spring Security in the backend and provides many useful extensions in the frontend. The official Hilla documentation contains a very comprehensive Guide, which describes very well how to use Spring Security.
In a corporate context, user credentials and data are usually stored in a central identity provider, such as an Active Directory. In my experience, business web apps usually do not have direct access to this identity provider, for example to check the user’s login information directly as part of the authentication process. Instead, many companies rely on authentication procedures based on OAuth 2.0 or OpenID Connect (OIDC).
OAuth 2.0 and the Resource Owner Password Flow
This article describes how authentication based on the Resource Owner Password Flow of OAuth 2.0 can be implemented for Hilla. The Resource Owner Password Flow is well suited for authenticating users of web apps in a protected corporate context. An introduction to OAuth 2.0 is not part of this article. I would therefore like to refer to the documentation from auth0.com at this point. It contains a very good overview of OAuth 2.0 and the various flows and grant types. The authorization server used in this article is Keycloak. With reference to the following example, which will be developed further on, the Resource Owner Password Flow in combination with Hilla and Keycloak works as follows:
- A user opens the Hilla web app in the browser via
http://localhost:8080. - Hilla renders a login form:
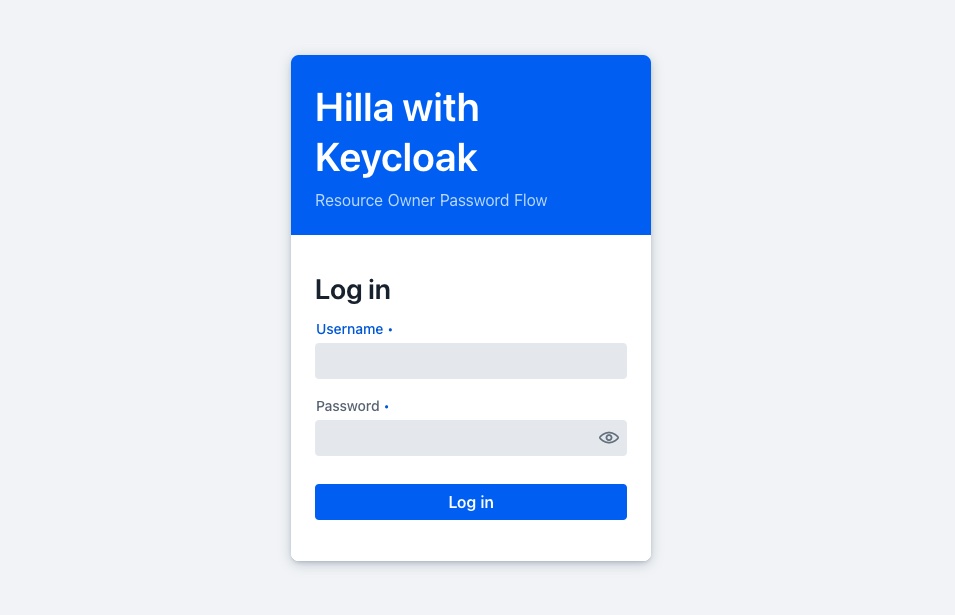
- The login form is sent to the Hilla backend with the login information.
- The Hilla backend sends the login information to Keycloak. Keycloak authenticates the user.
POST http://localhost:11111/realms/test/protocol/openid-connect/token
  grant_type=password
  username=<USERNAME>
  password=<PASSWORD>
  client_id=hilla
  client_secret=****
- After successful authentication, Keycloak sends an access token in the form of a JSON Web Token (JWT) to Hilla. The payload of the JWT contains the following data, among others:
{
  ...
  "exp": 1705659894,
  "iat": 1705659594,
  "auth_time": 1705659567,
  "iss": "http://localhost:11111/realms/test",
  "aud": "account",
  "sub": "cd026591-5cb2-4089-970b-f317153ae6c8",
  "typ": "Bearer",
  "azp": "hilla",
  "scope": "openid profile email"
  ...
}
- Hilla calls the user info endpoint of Keycloak. The received access token is included in the HTTP header
Authorization: Bearer <ACCESS_TOKEN>.
GET http://localhost:11111/realms/test/protocol/openid-connect/userinfo
- Keycloak sends the user information back to Hilla. This user information can look like the following example:
{
  "sub":"cd026591-5cb2-4089-970b-f317153ae6c8",
  "email_verified": true,
  "name": "John Doe",
  "preferred_username": "jd",
  "given_name": "John",
  "family_name": "Doe",
  "email": "john.doe@example.com"
}
Compared to the Authorization Code Flow, the Resource Owner Password Flow does not require users to log in via a login page provided by Keycloak. Instead, the web app itself can offer a login form that users can use to log in. This may be desirable under certain circumstances, for example, to prevent users from leaving the web app and thus possibly making them feel insecure.
Two more important notes on the Resource Owner Password Flow at this point:
- The Resource Owner Password Flow should only be used if there is a secure and trustworthy connection between the client and the Resource Server. For business web apps in a corporate context and in conjunction with Hilla, I believe that this secure and trustworthy connection is usually provided.
- The Resource Owner Password Flow is no longer included in the draft for the upcoming version 2.1 of OAuth. What impact this will have on the long-term support of the Resource Owner Password Flow in frameworks such as Spring Security and Authorization Servers such as Keycloak is not yet foreseeable.
The rest of the article describes how to configure Keycloak and Hilla in order to be able to reproduce the Resource Owner Password Flow shown.
Setting up Keycloak
Starting as a container
For this example, Keycloak is executed locally in a container. This requires an appropriate runtime environment for containers. For example, Docker Desktop or Podman Desktop can be used here.
After the runtime environment has been installed and started, a new container with a running Keycloak instance can be started as follows:
podman run --name keycloak --detach --publish 11111:8080 --env KEYCLOAK_ADMIN=admin --env KEYCLOAK_ADMIN_PASSWORD=admin quay.io/keycloak/keycloak:latest start-dev
The username and password are passed as environment variables. The Keycloak instance can then be accessed via http://localhost:11111/admin.
The following commands can be used to stop and delete the container if required:
podman stop keycloak && podman rm keycloak
Creating a realm
The required configurations, which will be made in Keycloak later on, are made in a realm. It is advisable to create a new realm with the name test. To do this, you must log in to the Keycloak web interface as user admin at http://localhost:11111/admin.
The exact procedure for creating a realm is described in the Keycloak documentation. After the realm has been created, Keycloak automatically switches to the new test realm.
Create a client
Then a new client must be created in the test realm. The name hilla should be used as the client ID. In addition, Client authentication must be activated for this client. This causes Keycloak to create a client secret for this client. The client ID and secret are required later on for the configuration of Spring Security. Direct access grants must be selected as the Authentication flow, as this corresponds to the Resource Owner Password Flow shown above.
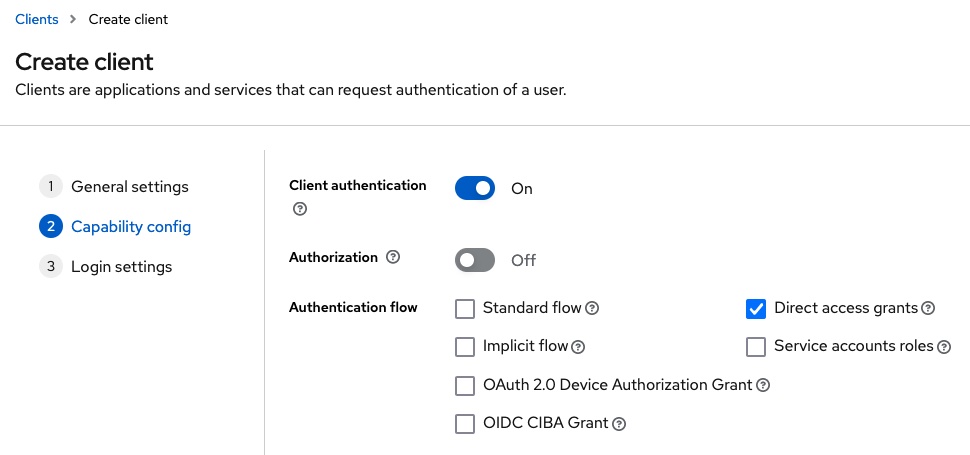
No further details need to be entered when creating the client.
For further details on creating and configuring clients, please refer to the official Keycloak documentation.
Create a user
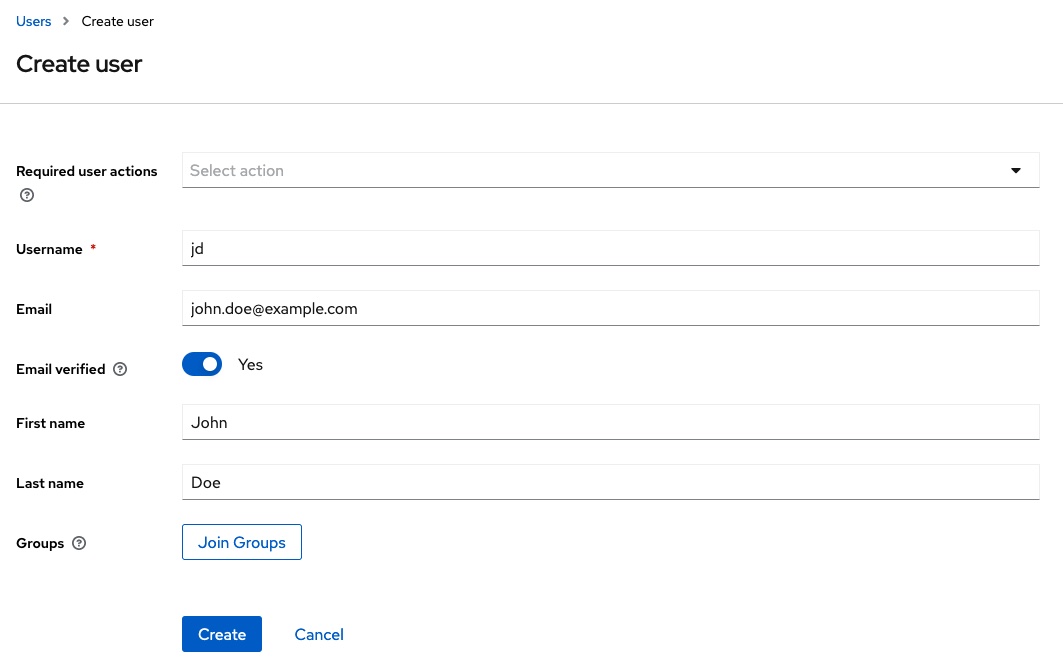
As described at the beginning, Keycloak is usually linked to an identity provider in a corporate context. To avoid increasing the complexity of the example too much, this is not used here. Instead, a user is created directly in Keycloak in the test realm.
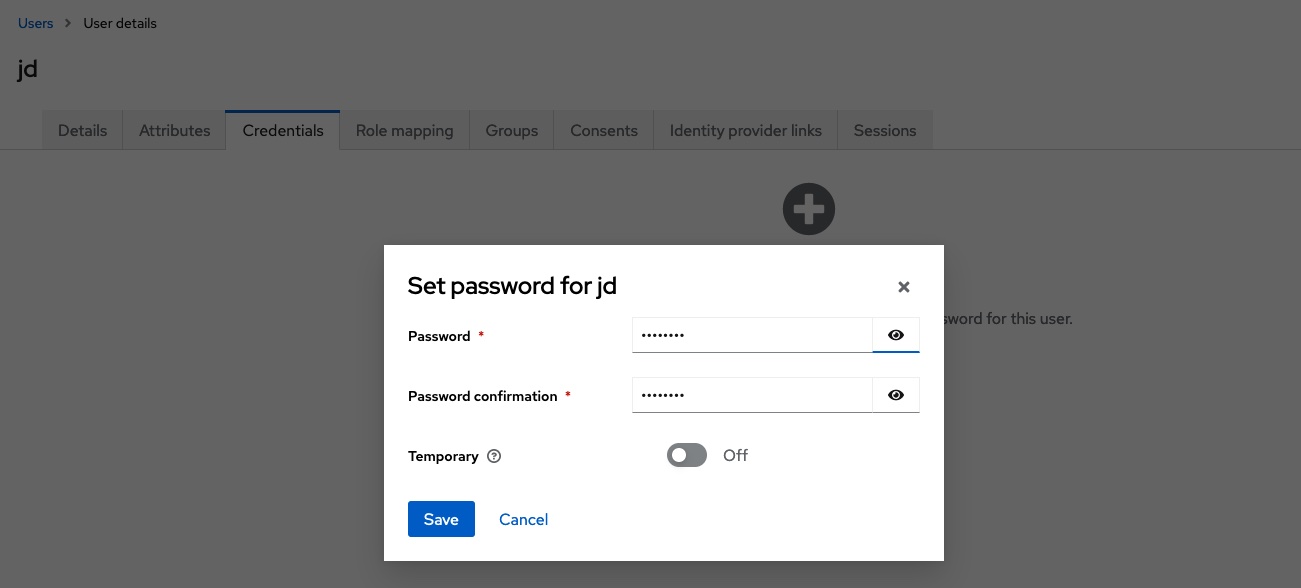
After the user has been created, credentials are assigned to it. In this example, the value password is used as the password. To save further manual steps, the password is marked as non-temporary.
Further information on creating and managing users can be found in the Keycloak documentation.
Export a realm
The realm created and the contained client and user can be exported to a JSON file. This way they can be reused later, if required. To do this, execute the following command in the terminal:
podman exec -it keycloak /opt/keycloak/bin/kc.sh export --file /tmp/realm-export.json --realm test --users realm_file
podman cp keycloak:/tmp/realm-export.json /path/to/folder/with/realm-export
The JSON file realm-export.json is then located in the directory /path/to/folder/with/realm-export. If you restart the Keycloak container at a later time, you can include the file via a volume and import it when you start Keycloak:
podman run --name keycloak --detach --publish 11111:8080 --env KEYCLOAK_ADMIN=admin --env KEYCLOAK_ADMIN_PASSWORD=admin --volume /path/to/folder/with/realm-export:/opt/keycloak/data/import quay.io/keycloak/keycloak:latest start-dev --import-realm
Hilla project hilla-oauth-resource-owner-password-flow-keycloak
Now that the Keycloak instance is available with the required configuration, the next step is to create a new Hilla project. The Hilla CLI can be used for this purpose:
npx @hilla/cli init hilla-oauth-resource-owner-password-flow-keycloak
The next step is to make the necessary extensions to the Hilla backend.
Spring Security configuration
The required dependencies for Spring Security and OAuth 2.0 are added in the pom.xml.
<dependency>
    <groupId>org.springframework.boot</groupId>
    <artifactId>spring-boot-starter-security</artifactId>
</dependency>
<dependency>
    <groupId>org.springframework.security</groupId>
    <artifactId>spring-security-oauth2-client</artifactId>
</dependency>
<dependency>
    <groupId>org.springframework.security</groupId>
    <artifactId>spring-security-oauth2-resource-server</artifactId>
</dependency>
<dependency>
    <groupId>org.springframework.security</groupId>
    <artifactId>spring-security-oauth2-jose</artifactId>
</dependency>
The next step is to create the configuration for Spring Security. In order to do this, the following information is first added to application.properties:
spring.security.oauth2.client.registration.keycloak.client-id=hilla
spring.security.oauth2.client.registration.keycloak.client-secret=<CLIENT_SECRET>
spring.security.oauth2.client.registration.keycloak.scope=openid
spring.security.oauth2.client.registration.keycloak.authorization-grant-type=password

spring.security.oauth2.client.provider.keycloak.issuer-uri=http://localhost:11111/realms/test
spring.security.oauth2.client.provider.keycloak.user-name-attribute=preferred_username
The file SecurityConfig.java is now created:
import com.vaadin.flow.spring.security.VaadinWebSecurity;
import org.springframework.context.annotation.Configuration;
import org.springframework.security.config.Customizer;
import org.springframework.security.config.annotation.web.builders.HttpSecurity;
import org.springframework.security.config.annotation.web.configuration.EnableWebSecurity;
import org.springframework.security.web.util.matcher.AntPathRequestMatcher;

@EnableWebSecurity
@Configuration
public class SecurityConfig extends VaadinWebSecurity {

    @Override
    protected void configure(HttpSecurity http) throws Exception {
        http.authorizeHttpRequests(authorize ->
                authorize.requestMatchers(
                        new AntPathRequestMatcher("/images/*.png"),
                        new AntPathRequestMatcher("/line-awesome/**/*.svg")
                ).permitAll()
        );
        super.configure(http);
        http.oauth2Client(Customizer.withDefaults());
        setLoginView(http, "/login");
    }
}
This configuration extends VaadinWebSecurity. This ensures that the required basic configurations for Hilla are set correctly. Further details can be found here. A request matcher is defined for some static files, such as images and icons, so that these files can also be retrieved without authentication. http.oauth2Client(Customizer.withDefaults()) creates an OAuth 2.0 client with default settings based on the information in the application.properties, among other things. setLoginView(http, "/login") sets the path for the login view in the Hilla frontend, which will be created later.
A central challenge when configuring the Resource Owner Password Flow in conjunction with Spring Security and Hilla is the correct transfer of the login information. As a reminder: A user enters their login information in a login form in the Hilla frontend. The credentials must then be extracted in the Hilla backend and passed to Spring Security so that Spring Security can perform the authentication via the Resource Owner Password Flow in conjunction with Keycloak. With the help of the information from the documentation of Spring Security, the file SecurityConfig.java is extended by a bean with the name authorizedClientManager:
    @Bean
    public OAuth2AuthorizedClientManager authorizedClientManager(
            ClientRegistrationRepository clientRegistrationRepository,
            OAuth2AuthorizedClientRepository authorizedClientRepository) {

        OAuth2AuthorizedClientProvider authorizedClientProvider =
                OAuth2AuthorizedClientProviderBuilder.builder()
                        .password()
                        .refreshToken()
                        .build();

        DefaultOAuth2AuthorizedClientManager authorizedClientManager =
                new DefaultOAuth2AuthorizedClientManager(clientRegistrationRepository, authorizedClientRepository);
        authorizedClientManager.setAuthorizedClientProvider(authorizedClientProvider);

        authorizedClientManager.setContextAttributesMapper(authorizeRequest -> {
            Map<String, Object> contextAttributes = new HashMap<>();
            String username = authorizeRequest.getAttribute(OAuth2ParameterNames.USERNAME);
            String password = authorizeRequest.getAttribute(OAuth2ParameterNames.PASSWORD);
            contextAttributes.put(OAuth2AuthorizationContext.USERNAME_ATTRIBUTE_NAME, username);
            contextAttributes.put(OAuth2AuthorizationContext.PASSWORD_ATTRIBUTE_NAME, password);
            return contextAttributes;
        });

        return authorizedClientManager;
    }
An OAuth2AuthorizedClientProvider is created using a suitable builder and configured to the Resource Owner Password Flow using password(). A new DefaultOAuth2AuthorizedClientManager is then created. The setContextAttributesMapper method is used to transfer the login information username and password from the login request of the Hilla frontend to the authentication context of Spring Security. For the authentication against Keycloak, the login information must be read from the authentication context and set correctly. For this purpose, a customized AuthenticationProvider is created in CustomAuthenticationProvider.java:
import org.springframework.beans.factory.annotation.Autowired;
import org.springframework.security.authentication.AuthenticationProvider;
import org.springframework.security.authentication.UsernamePasswordAuthenticationToken;
import org.springframework.security.core.Authentication;
import org.springframework.security.core.AuthenticationException;
import org.springframework.security.oauth2.client.OAuth2AuthorizeRequest;
import org.springframework.security.oauth2.client.OAuth2AuthorizedClient;
import org.springframework.security.oauth2.client.OAuth2AuthorizedClientManager;
import org.springframework.security.oauth2.core.endpoint.OAuth2ParameterNames;
import org.springframework.security.oauth2.server.resource.authentication.BearerTokenAuthenticationToken;
import org.springframework.stereotype.Component;

@Component
public class CustomAuthenticationProvider implements AuthenticationProvider {

    @Autowired
    private OAuth2AuthorizedClientManager authorizedClientManager;

    @Override
    public Authentication authenticate(Authentication authentication) throws AuthenticationException {
        String username = authentication.getName();
        String password = authentication.getCredentials().toString();

        OAuth2AuthorizeRequest authorizeRequest = OAuth2AuthorizeRequest.withClientRegistrationId("keycloak")
                .principal(authentication)
                .attributes(attrs -> {
                    attrs.put(OAuth2ParameterNames.USERNAME, username);
                    attrs.put(OAuth2ParameterNames.PASSWORD, password);
                })
                .build();
        OAuth2AuthorizedClient authorizedClient = this.authorizedClientManager.authorize(authorizeRequest);

        if (authorizedClient != null) {
            return new BearerTokenAuthenticationToken(authorizedClient.getAccessToken().getTokenValue());
        } else {
            return null;
        }
    }

    @Override
    public boolean supports(Class<?> authentication) {
        return authentication.equals(UsernamePasswordAuthenticationToken.class);
    }
}
The actual OAuth2AuthorizeRequest is now enriched with the login information from the authentication context and sent. If the authentication was successful, the access token received can be converted into a suitable BearerTokenAuthenticationToken.
The CustomAuthenticationProvider is now included in the SpringSecurity.java as an additional bean:
    @Bean
    public AuthenticationManager authenticationManager(CustomAuthenticationProvider customAuthenticationProvider) {
        return new ProviderManager(customAuthenticationProvider);
    }
The necessary configurations for Spring Security are now almost complete. Now the necessary extensions for the interaction with the Hilla frontend follow.
Extending the frontend
Before the login view can be created in the frontend, the BearerTokenAuthenticationToken must first be converted into a user that is suitable for use in conjunction with the frontend.
UserAuthenticationService
A service is created in the Hilla backend that provides the currently logged-in user. A user is represented by the following simple DTO User.java:
import dev.hilla.Nonnull;

public class User {

    @Nonnull
    private String username;

    @Nonnull
    private String firstname;

    @Nonnull
    private String lastname;

    @Nonnull
    private String email;

    // Getter

    // Setter
}
The next step is to implement the service in UserAuthenticationService.java:
import com.example.application.entities.User;
import com.vaadin.flow.server.auth.AnonymousAllowed;
import com.vaadin.flow.spring.security.AuthenticationContext;
import dev.hilla.BrowserCallable;
import org.springframework.beans.factory.annotation.Autowired;
import org.springframework.security.core.Authentication;
import org.springframework.security.core.context.SecurityContext;
import org.springframework.security.core.context.SecurityContextHolder;
import org.springframework.security.oauth2.server.resource.authentication.BearerTokenAuthenticationToken;

import java.util.Optional;

@BrowserCallable
@AnonymousAllowed
public class UserAuthenticationService {

    @Autowired
    private AuthenticationContext authenticationContext;

    public Optional<User> getAuthenticatedUser() {
        SecurityContext context = SecurityContextHolder.getContext();
        Authentication authentication = context.getAuthentication();
        if (authentication instanceof BearerTokenAuthenticationToken bearerTokenAuthenticationToken) {
            // TOOD
        }
        return Optional.empty();
    }
}
The annotation @BrowserCallable ensures that Hilla automatically generates the required endpoint and the associated client-side TypeScript code. This means that no further programming is required later, e.g. to establish the communication link between the frontend and backend and to serialize or deserialize data. The annotation @AnonymousAllowed ensures that the methods within this service can be called without authentication.
The getAuthenticatedUser method returns the currently logged-in user, which is held in the SecurityContext of Spring Security. If there is no instance of the class BearerTokenAuthenticationToken in the SecurityContext, it means that no successful login via OAuth has taken place, or that the user has already logged out again. In this case, an empty Optional<User> is returned. This signals to the frontend that no user is logged in.
The instance of the BearerTokenAuthenticationToken class currently only contains an access token. This access token must be used to call the user info endpoint of Keycloak in order to obtain the required information about the logged-in user. The user info endpoint is called with the help of a RestTemplate. For this purpose, a RestTemplate is first made available as a bean in SecurityConfig.java:
    @Bean
    public RestTemplate restTemplate(RestTemplateBuilder builder) {
        return builder.build();
    }
The URL to the Keycloak user info endpoint is stored in application.properties:
keycloak.userinfo-uri=http://localhost:11111/realms/test/protocol/openid-connect/userinfo
The RestTemplate and URL are added to UserAuthenticationService.java:
    @Autowired
    private RestTemplate restTemplate;

    @Value("${keycloak.userinfo-uri}")
    private String userinfoUri;
Also in UserAuthenticationService.java the method getUserInfo is now added, which calls the user info endpoint:
    private Optional<UserInfo> getUserInfo(String accessToken) {
        HttpHeaders headers = new HttpHeaders();
        headers.setAccept(Collections.singletonList(MediaType.APPLICATION_JSON));
        headers.setBearerAuth(accessToken);
        HttpEntity<Void> requestEntity = new HttpEntity<>(headers);
        ResponseEntity<UserInfo> userInfoResponse = restTemplate.exchange(userinfoUri, HttpMethod.GET, requestEntity, UserInfo.class);
        UserInfo userInfo = userInfoResponse.getBody();
        if (userInfo != null) {
            return Optional.of(userInfo);
        } else {
            return Optional.empty();
        }
    }
The UserInfo class used here is again a simple DTO, which is created in UserInfo.java with the following content:
import com.fasterxml.jackson.annotation.JsonProperty;

public class UserInfo {

    private String name;

    @JsonProperty("preferred_username")
    private String preferredUsername;

    @JsonProperty("given_name")
    private String givenName;

    @JsonProperty("family_name")
    private String familyName;

    private String email;

    // Getter

    // Setter
    }
The method getUserInfo is now used in UserAuthenticationService.java as follows:
    public Optional<User> getAuthenticatedUser() {
        SecurityContext context = SecurityContextHolder.getContext();
        Authentication authentication = context.getAuthentication();
        if (authentication instanceof BearerTokenAuthenticationToken bearerTokenAuthenticationToken) {
            Optional<UserInfo> userInfo = getUserInfo(bearerTokenAuthenticationToken.getToken());
            if (userInfo.isPresent()) {
                return Optional.of(new User(userInfo.get()));
            }
        }
        return Optional.empty();
    }
A suitable constructor must be added to User.java so that a new instance of the User class can be created using a UserInfo object:
    public User(UserInfo userInfo) {
        this.username = userInfo.getPreferredUsername();
        this.firstname = userInfo.getGivenName();
        this.lastname = userInfo.getFamilyName();
        this.email = userInfo.getEmail();
    }
The getAuthenticatedUser method of the UserAuthenticationService is now prepared to such an extent that it can be integrated into the Hilla frontend in the next step.
Configuring authentication in the frontend
An AuthProvider is added to the Hilla frontend, which can retrieve the current authentication information from the backend. To do this, the file auth.ts is created in the frontend/util directory:
import { configureAuth } from '@hilla/react-auth';
import { UserAuthenticationService } from 'Frontend/generated/endpoints';

const auth = configureAuth(UserAuthenticationService.getAuthenticatedUser);

export const useAuth = auth.useAuth;
export const AuthProvider = auth.AuthProvider;
Hilla provides the configureAuth function for this purpose. This function receives the information on the logged-in user from the UserAuthenticationService. The exported AuthProvider is then integrated into the App.tsx:
import router from 'Frontend/routes.js';
import { RouterProvider } from 'react-router-dom';
import { AuthProvider } from 'Frontend/util/auth';

export default function App() {
  return (
    <AuthProvider>
      <RouterProvider router={router} />
    </AuthProvider>
  )
}
This means that the information about the logged-in user is available in React.
Add login view
The previously mentioned login view is now also created in the frontend. To do this, the file frontend/login/LoginView.tsx is created with the following content:
import { LoginI18n, LoginOverlay, LoginOverlayElement } from '@hilla/react-components/LoginOverlay.js';
import { useState } from 'react';
import { useAuth } from 'Frontend/util/auth.js';
import { useNavigate } from 'react-router-dom';

const loginI18n: LoginI18n = {
    ...new LoginOverlayElement().i18n,
    header: { title: 'Hilla with Keycloak', description: 'Resource Owner Password Flow' },
  };

export default function LoginView() {
  const { login } = useAuth();
  const [hasError, setError] = useState<boolean>();
  const navigate = useNavigate();

  return (
    <LoginOverlay
      opened
      error={hasError}
      noForgotPassword
      i18n={loginI18n}
      onLogin={async ({ detail: { username, password } }) => {
        const { error } = await login(username, password);

        if (error) {
          setError(true);
        } else {
          navigate('/');
        }
      }}
    />
  );
}
The login view is also added to the frontend/routes.tsx file:
import HelloWorldView from 'Frontend/views/helloworld/HelloWorldView.js';
import LoginView from 'Frontend/views/login/LoginView.js';
import MainLayout from 'Frontend/views/MainLayout.js';
import { lazy } from 'react';
import { createBrowserRouter, RouteObject } from 'react-router-dom';

const AboutView = lazy(async () => import('Frontend/views/about/AboutView.js'));

export const routes = [
  {
    element: <MainLayout />,
    handle: { title: 'Main' },
    children: [
      { path: '/', element: <HelloWorldView />, handle: { title: 'Hello World' } },
      { path: '/about', element: <AboutView />, handle: { title: 'About' } },
    ],
  },
  { path: '/login', element: <LoginView /> },
] as RouteObject[];

export default createBrowserRouter(routes);
At this point, the application can already be started with ./mvnw. If the Hilla web app is opened in the browser at http://localhost:8080, the Resource Owner Password Flow is executed as described at the beginning of this article.
Display user and enable logout
The file frontend/views/MainLayout.tsx can now be extended to display the currently logged-in user and to include a button that can be used to log out:
import { AppLayout } from '@hilla/react-components/AppLayout.js';
import { Avatar } from '@hilla/react-components/Avatar.js';
import { Button } from '@hilla/react-components/Button.js';
import { DrawerToggle } from '@hilla/react-components/DrawerToggle.js';
import Placeholder from 'Frontend/components/placeholder/Placeholder.js';
import { useRouteMetadata } from 'Frontend/util/routing.js';
import { Suspense, useEffect } from 'react';
import { NavLink, Outlet, useNavigate } from 'react-router-dom';
import { useAuth } from 'Frontend/util/auth.js';

const navLinkClasses = ({ isActive }: any) => {
  return `block rounded-m p-s ${isActive ? 'bg-primary-10 text-primary' : 'text-body'}`;
};

export default function MainLayout() {
  const currentTitle = useRouteMetadata()?.title ?? 'My App';
  const { state, logout } = useAuth();
  const navigate = useNavigate();
  useEffect(() => {
    document.title = currentTitle;
  }, [currentTitle]);

  return (
    <AppLayout primarySection="drawer">
      <div slot="drawer" className="flex flex-col justify-between h-full p-m">
        <header className="flex flex-col gap-m">
          <h1 className="text-l m-0">My App</h1>
          <nav>
            <NavLink className={navLinkClasses} to="/">
              Hello World
            </NavLink>
            <NavLink className={navLinkClasses} to="/about">
              About
            </NavLink>
          </nav>
        </header>
        <footer className="flex flex-col gap-s">
          {state.user && (
            <>
              <div className="flex items-center gap-s">
                <Avatar theme="xsmall" name={state.user.username} />
                {state.user.firstname} {state.user.lastname}
              </div>
              <Button onClick={async () => {
                await logout()
                navigate('/login')
              }}>Sign out</Button>
            </>
          )}
        </footer>
      </div>

      <DrawerToggle slot="navbar" aria-label="Menu toggle"></DrawerToggle>
      <h2 slot="navbar" className="text-l m-0">
        {currentTitle}
      </h2>

      <Suspense fallback={<Placeholder />}>
        <Outlet />
      </Suspense>
    </AppLayout>
  );
}
In the footer area of the menu of the Hilla web app, you will now find information about the logged-in user and a button to log out.
Role-based authorization
The authentication shown in the example can be flexibly extended both in the backend and in the frontend. Roles can be defined in Keycloak, which can then also be made available in the information about the logged-in user. This role information can then be taken into account in both the backend and the frontend, for example to make certain services or routes available only to certain roles.
Keycloak extension
Another user (Jane Roe) with a password is created in Keycloak first.
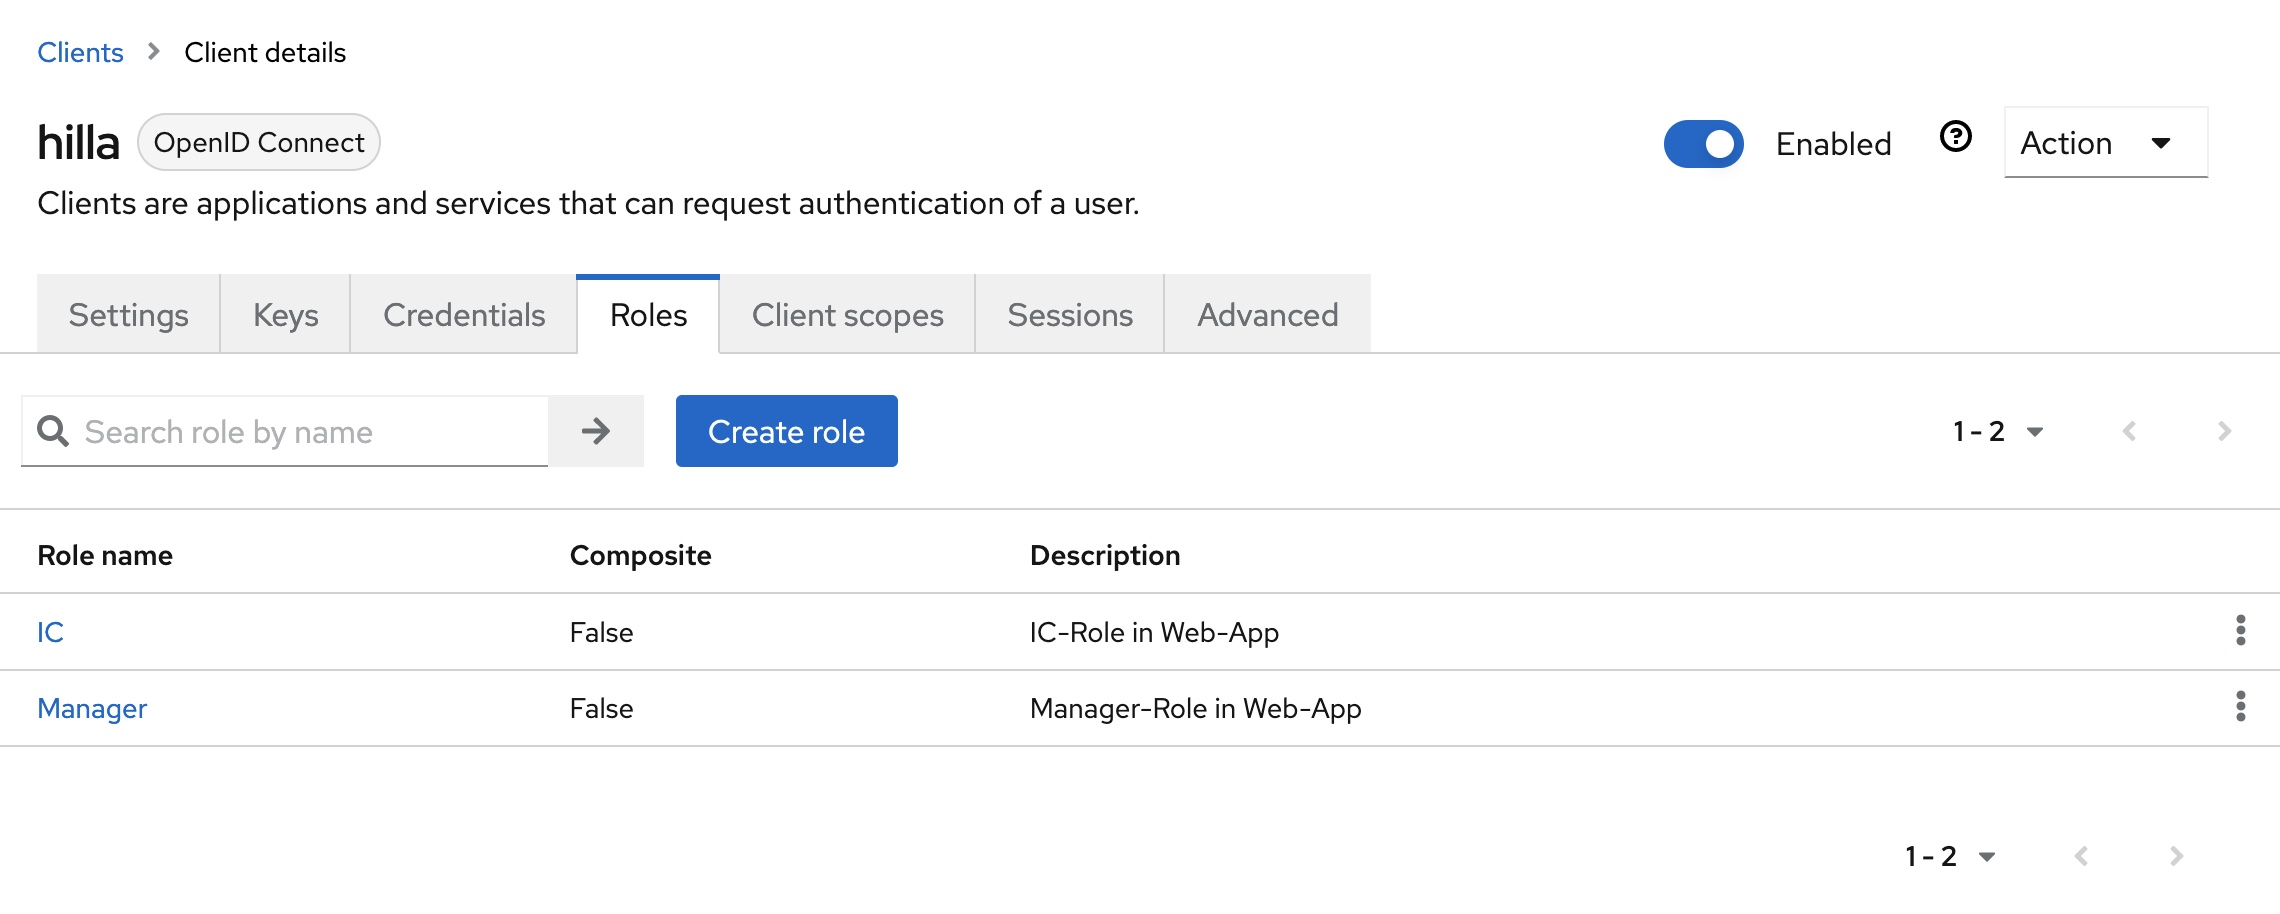
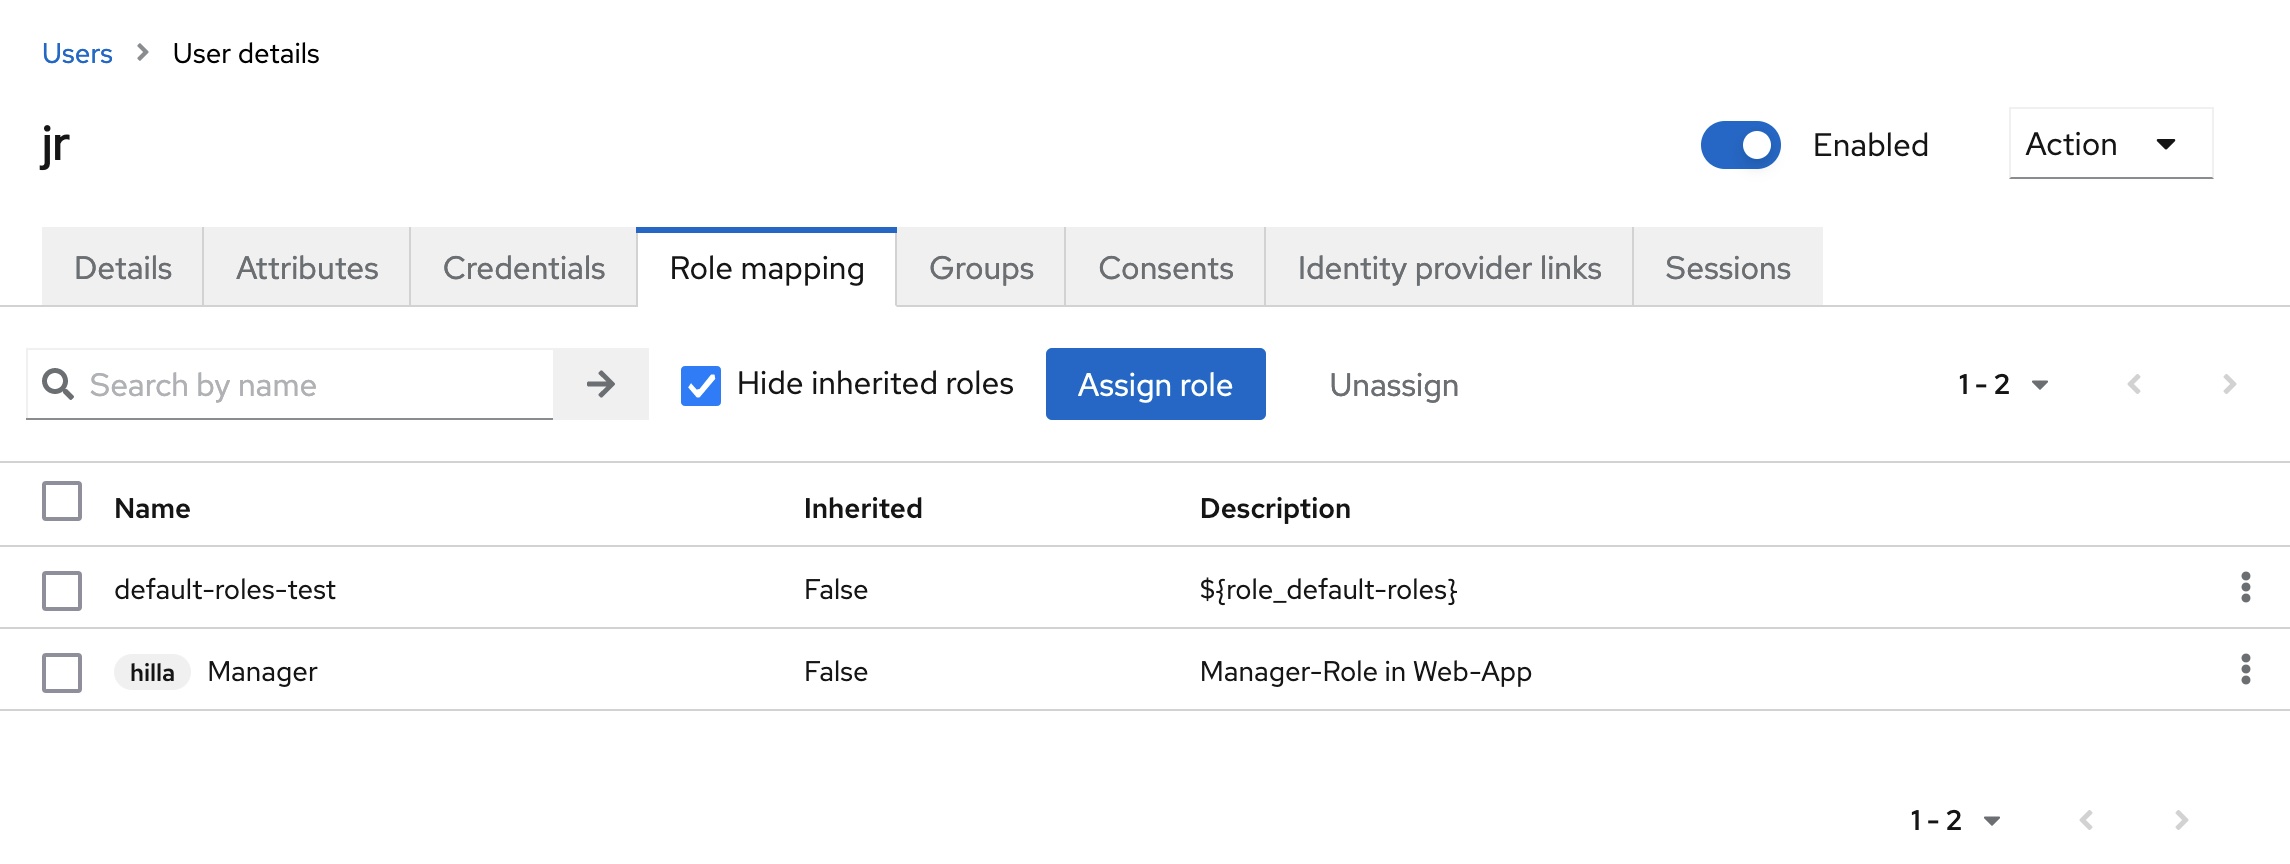
The configuration of the existing client hilla is then extended. The two roles Manager and IC are created in the Roles tab.
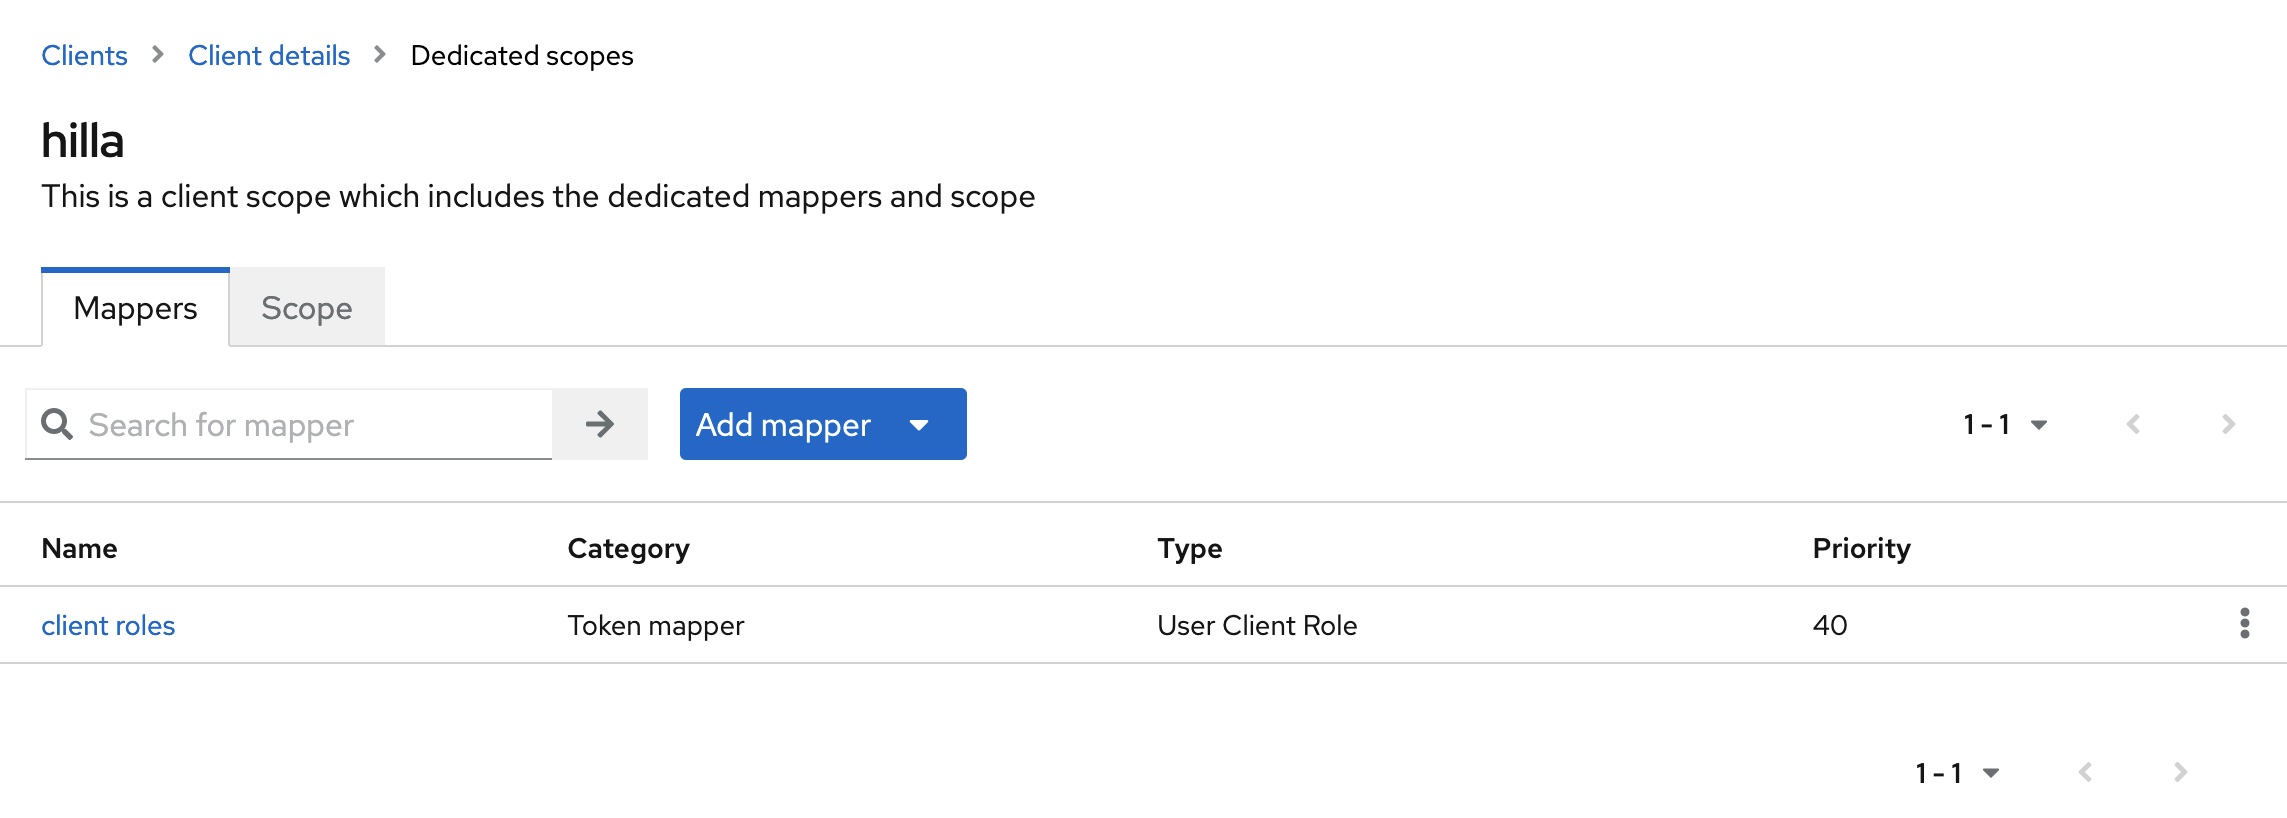
The client scope with the name hilla-dedicated must then be edited in the Client scopes tab. The mapper with the name client roles and the type User Client Role is added to the Mappers tab.
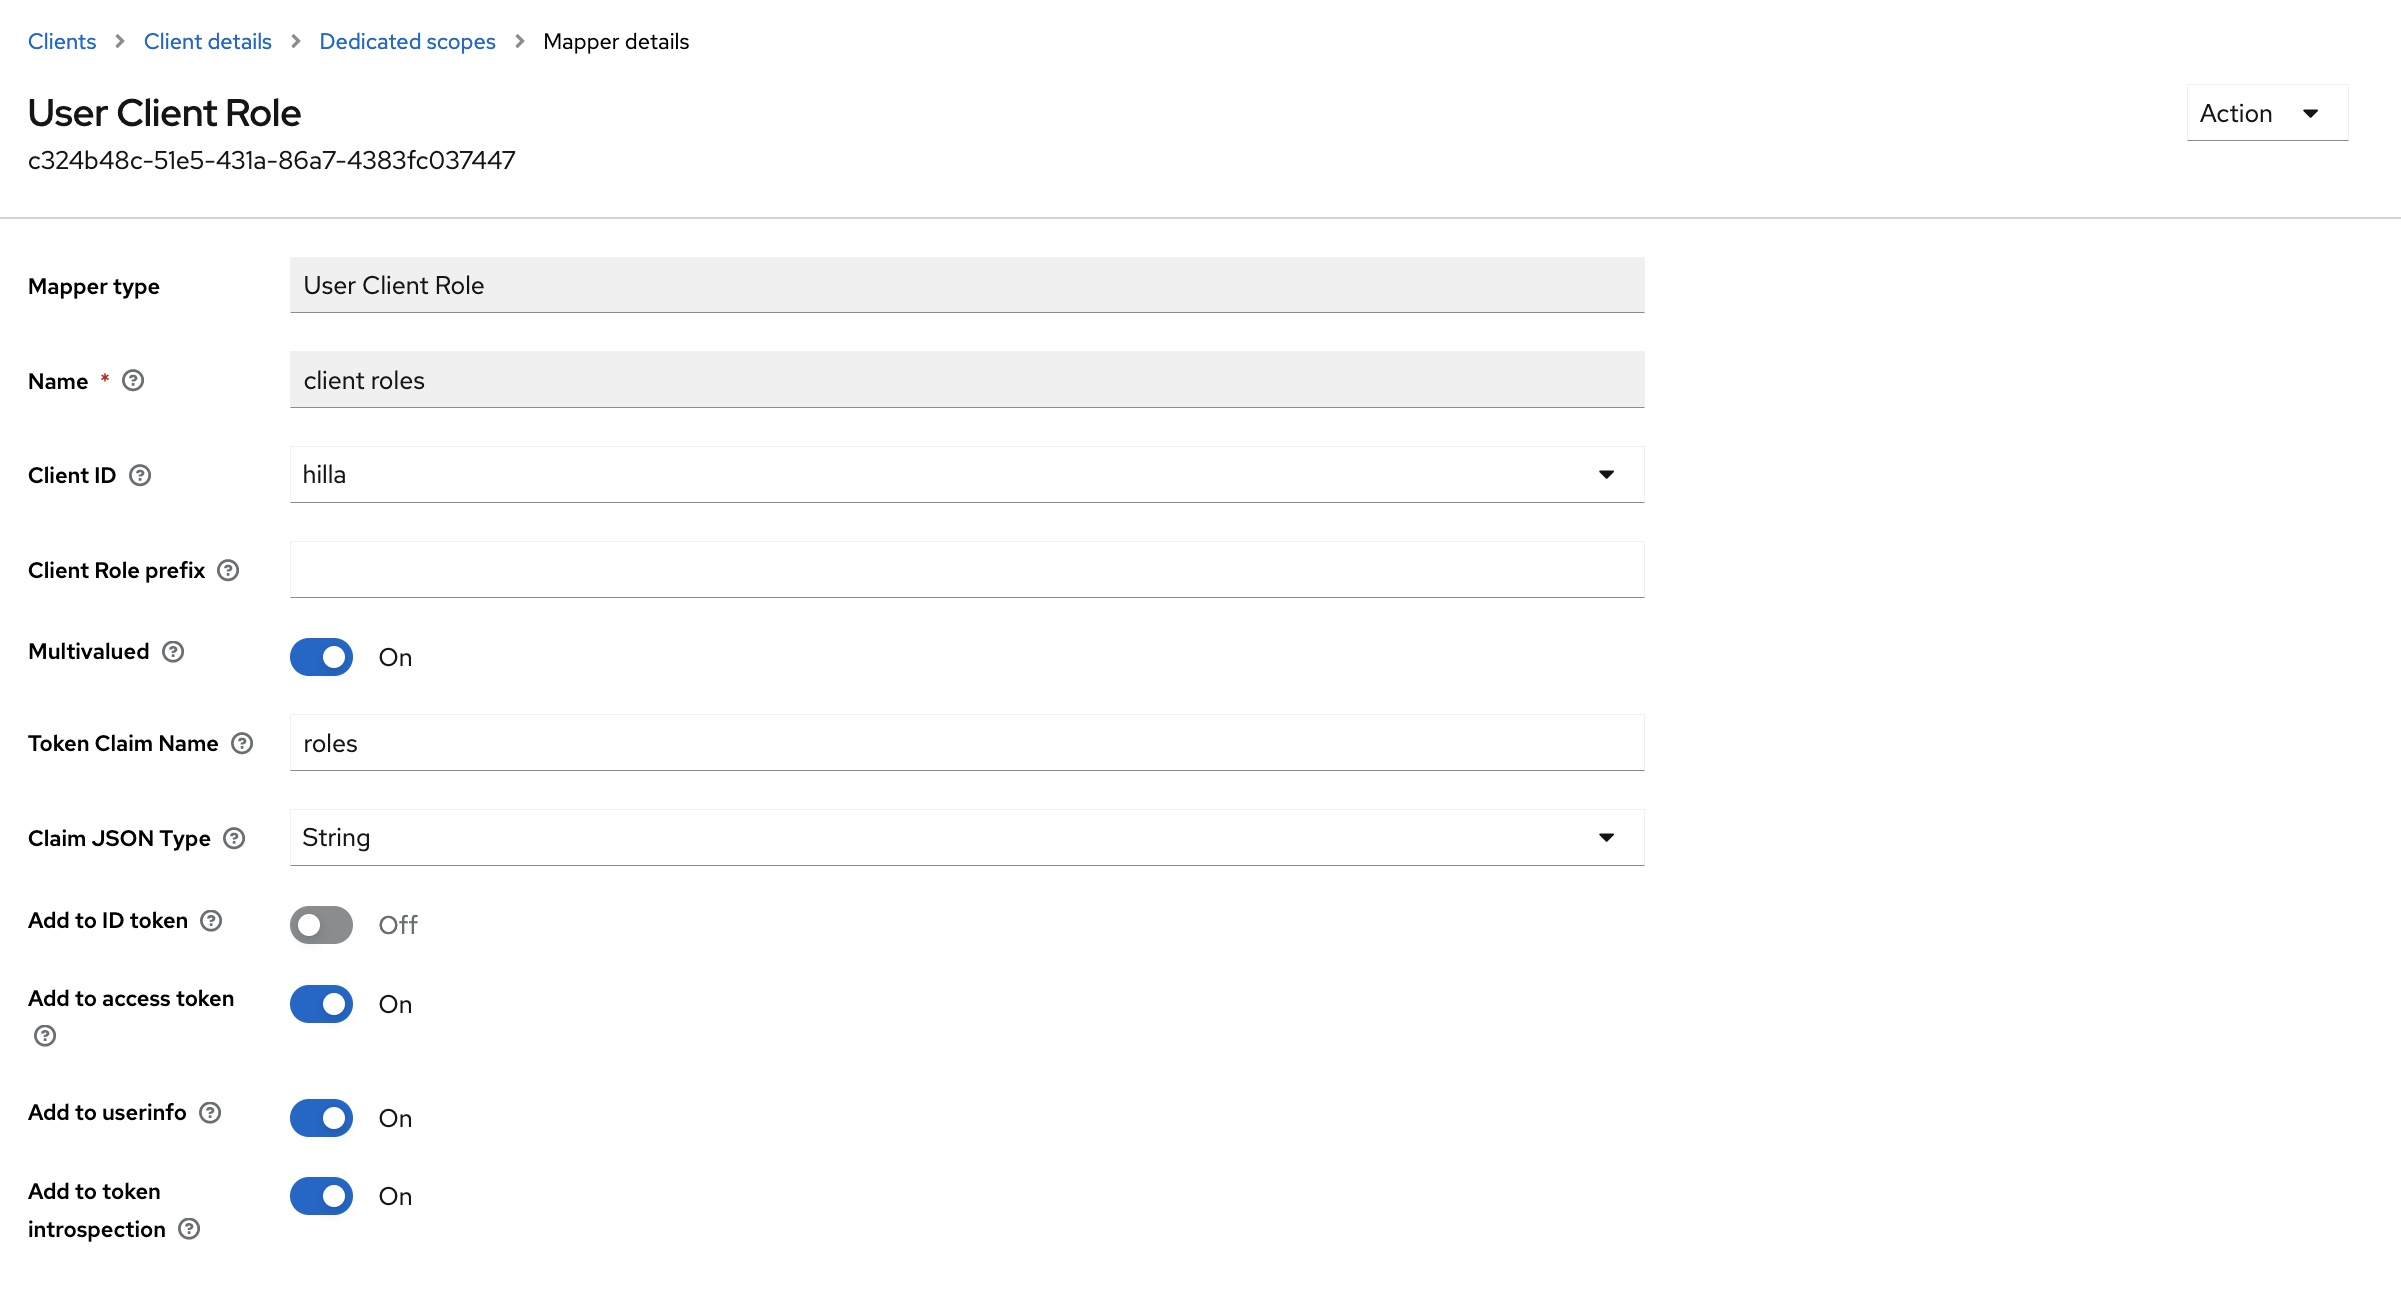
The mapper must then be adjusted:
- The value
hillashould be selected in theClient IDfield. This ensures that only the two rolesManagerorICare taken into account. - In the
Token Claim Namefield, the value can be shortened toroles. This simplifies further processing in the Hilla backend. - The option
Add to userinfomust be activated. This means that the claimrolesis also included in the response from the call to the user info endpoint.
Finally, the user John Doe is assigned the role IC. Jane Roe is assigned the role Manager.
This configuration adjustment means that the assigned role is contained in the roles claim of the access token and in the user info endpoint:
{
  ...
  "roles": [
    "IC"
  ],
  "name": "John Doe",
  "preferred_username": "jd",
  "given_name": "John",
  "family_name": "Doe",
  "email": "john.doe@example.com"
}
Backend extension
In the backend, both the DTO UserInfo.java and the DTO User.java must be extended by the field roles:
import com.fasterxml.jackson.annotation.JsonProperty;
import java.util.Collection;

public class UserInfo {

    private String name;

    @JsonProperty("preferred_username")
    private String preferredUsername;

    @JsonProperty("given_name")
    private String givenName;

    @JsonProperty("family_name")
    private String familyName;

    private String email;

    private Collection<String> roles;

    // Getter

    // Setter
}
import dev.hilla.Nonnull;
import org.springframework.security.oauth2.core.oidc.OidcUserInfo;

import java.util.Collection;

public class User {

    @Nonnull
    private String username;

    @Nonnull
    private String firstname;

    @Nonnull
    private String lastname;

    @Nonnull
    private String email;

    @Nonnull
    private Collection<String> roles;

    public User(OidcUserInfo userInfo, Collection<String> roles) {
        this.username = userInfo.getPreferredUsername();
        this.firstname =userInfo.getGivenName();
        this.lastname = userInfo.getFamilyName();
        this.email = userInfo.getEmail();
        this.roles = roles;
    }

    // Getter

    // Setter
}
Frontend extension
The Hilla frontend will be extended with three additional views:
- A
ManagerView, which should only be accessible to users with theManagerrole. - An
ICView, which should only be accessible to users with theICrole. - An
AccessDeniedView, which is displayed if access to the requested view or route is not permitted for the current user.
All three views do not contain any additional logic. They only show a text for identification, such as the ICView:
export default function ICView() {
    return (
      <div className="flex flex-col h-full items-center justify-center p-l text-center box-border">
        <h2>Individual contributor view</h2>
        <p>This view is only visible for users with the role 'IC'.</p>
      </div>
    );
  }
The route configuration for the frontend takes place in frontend/routes.tsx. The route configuration is secured with the help of protectRoutes. The required authentication or authorization is determined for each route:
import HelloWorldView from 'Frontend/views/helloworld/HelloWorldView.js';
import LoginView from 'Frontend/views/login/LoginView.js';
import MainLayout from 'Frontend/views/MainLayout.js';
import { lazy } from 'react';
import { createBrowserRouter, RouteObject } from 'react-router-dom';
import { protectRoutes } from '@hilla/react-auth';

const AboutView = lazy(async () => import('Frontend/views/about/AboutView.js'));
const AccessDeniedView = lazy(async () => import('Frontend/views/error/AccessDeniedView.js'));
const ICView = lazy(async () => import('Frontend/views/ic/ICView.js'));
const ManagerView = lazy(async () => import('Frontend/views/manager/ManagerView.js'));

export const routes: RouteObject[] = protectRoutes([
  {
    element: <MainLayout />,
    handle: { title: 'Main' },
    children: [
      { path: '/', element: <HelloWorldView />, handle: { title: 'Hello World', requiresLogin: true } },
      { path: '/about', element: <AboutView />, handle: { title: 'About', requiresLogin: true } },
      { path: '/ic', element: <ICView />, handle: { title: 'IC', rolesAllowed: ['IC'] } },
      { path: '/manager', element: <ManagerView />, handle: { title: 'Manager', rolesAllowed: ['Manager'] } },
      { path: '/access-denied', element: <AccessDeniedView />, handle: { title: 'Access denied' } },
    ],
  },
  { path: '/login', element: <LoginView /> },
], "/access-denied");

export default createBrowserRouter(routes);
Finally, the menu is expanded to include the additional entries for the new views. This also depends on the role of the current user. To do this, the file frontend/views/MainLayout.tsx is edited:
...
export default function MainLayout() {
  ...
  return (
    ...
        <header className="flex flex-col gap-m">
          <h1 className="text-l m-0">My App</h1>
          <nav>
            <NavLink className={navLinkClasses} to="/">
              Hello World
            </NavLink>
            <NavLink className={navLinkClasses} to="/about">
              About
            </NavLink>
            {state.user?.roles.indexOf('IC') !== -1 && (
              <NavLink className={navLinkClasses} to="/ic">
                IC
              </NavLink>
            )}
            {state.user?.roles.indexOf('Manager') !== -1 && (
              <NavLink className={navLinkClasses} to="/manager">
                Manager
              </NavLink>
            )}
          </nav>
        </header>
    ...
  )
}
If you start the application again and log in and out alternately with the two existing users, you can see the differences in the menu. Manual calls to the routes /ic or /manager are redirected to /access-denied if the user currently logged in does not have the appropriate role.
Further information on securing views in the Hilla frontend can be found in the Hilla documentation.
Outlook
The existing role information can also be used in the backend, for example to define which users are allowed to access which services. A service that is provided with the annotation @BrowserCallable can also have the annotation @RolesAllowed. This will restrict the frontend’s ability to call the backend to the roles of the currently logged-in user. Further information on this can be found in the Hilla documentation.
Summary
Hilla is a great full-stack framework for developing business web apps. The authentication and authorization of users can be implemented in the backend using the familiar mechanisms of Spring Security. The use of the OAuth 2.0 Resource Owner Password Flow in conjunction with Keycloak is quickly implemented and can be extended flexibly to include role-based authorization. In the frontend, Hilla offers many useful extensions to enrich the web app with information about the logged-in user and to display individual views or routes depending on the existing user roles.
The source code for the example is available at GitHub.