
Article series
This is the second part of a small article series about how to build Hilla web apps for Apache Kafka.
- Part 1: Consuming messages
- Part 2: Producing messages
- Part 3: Kafka Streams
In this blog post, we will learn how to produce Kafka messages from a user input in a Hilla frontend and a KafkaTemplate in the Hilla backend.
Setup Kafka and Hilla project
Please read the first blog post of this article series to find out how to set up a local Kafka Broker and how to consume messages from the reservations topic in the corresponding Hilla web app.
Add KafkaTemplate to Hilla backend
In order to produce a new message for the reservations topic, we will use an auto-configured KafkaTemplate. This requires some additional configuration in the application.properties in the Hilla backend:
# Configure the producer
spring.kafka.producer.client-id=reservation-producer-client
spring.kafka.producer.key-serializer=org.apache.kafka.common.serialization.StringSerializer
spring.kafka.producer.value-serializer=org.springframework.kafka.support.serializer.JsonSerializer
We use Spring Kafka’s built-in JsonSerializer to serialize a Reservation object into a message for the topic reservations.
The auto-configured KafkaTemplate can now be used in a KafkaProducerService.
package de.rwi.hillakafkaexample.kafka;

import org.springframework.kafka.core.KafkaTemplate;

import de.rwi.hillakafkaexample.reservation.Reservation;
import com.vaadin.flow.server.auth.AnonymousAllowed;
import com.vaadin.hilla.BrowserCallable;

@BrowserCallable
@AnonymousAllowed
public class KafkaProducerService {

    private final KafkaTemplate<String, Reservation> kafkaTemplate;

    public KafkaProducerService(KafkaTemplate<String, Reservation> kafkaTemplate) {
        this.kafkaTemplate = kafkaTemplate;
    }

    public void produce(Reservation reservation) {
        kafkaTemplate.send("reservations", reservation);
    }
}
The method produce will receive a new reservation from the frontend and pass it to the KafkaTemplate.
Add form to Hilla frontend
Next up, we extend the existing ReservationsView in the Hilla frontend.
import { ActionOnLostSubscription } from '@vaadin/hilla-frontend';
import { useSignal } from '@vaadin/hilla-react-signals';
import {
  Button,
  DatePicker,
  Dialog,
  Grid,
  GridColumn,
  HorizontalLayout,
  Icon,
  Notification,
  TextField,
  VerticalLayout,
} from '@vaadin/react-components';
import { ViewToolbar } from 'Frontend/components/ViewToolbar';
import Reservation from 'Frontend/generated/de/rwi/hillakafkaexample/reservation/Reservation';
import { KafkaConsumerService, KafkaProducerService } from 'Frontend/generated/endpoints';
import { useEffect } from 'react';
import { useForm } from '@vaadin/hilla-react-form';
import ReservationModel from 'Frontend/generated/de/rwi/hillakafkaexample/reservation/ReservationModel';

export default function ReservationsView() {
  const reservations = useSignal<Reservation[]>();
  const subscriptionNotificationOpened = useSignal<boolean>(false);
  const subscriptionNotificationMessage = useSignal<string | undefined>(undefined);
  const newReservationDialogOpened = useSignal<boolean>(false);
  const { model, field, clear, submit, invalid } = useForm(ReservationModel, {
    onSubmit: async (reservation: Reservation) => {
      await KafkaProducerService.produce(reservation);
      closeNewReservationDialog();
    },
  });

  useEffect(() => {
    const reservationSubscription = KafkaConsumerService.getLatestReservation()
      .onNext((reservation: Reservation) => {
        reservations.value = [...(reservations.value ?? []), reservation];
      })
      .onError((message: string) => {
        subscriptionNotificationOpened.value = true;
        subscriptionNotificationMessage.value = message;
      })
      .onSubscriptionLost(() => ActionOnLostSubscription.RESUBSCRIBE);
    return () => reservationSubscription.cancel();
  }, []);

  const closeSubscriptionNotification = () => {
    subscriptionNotificationOpened.value = false;
    subscriptionNotificationMessage.value = undefined;
  };

  const closeNewReservationDialog = () => {
    newReservationDialogOpened.value = false;
    clear();
  };

  const retrySubscription = () => {
    window.location.reload();
  };

  return (
    <VerticalLayout theme="margin">
      <ViewToolbar title="Reservations" />
      <Grid items={reservations.value}>
        <GridColumn path={'id'} />
        <GridColumn path={'date'} />
        <GridColumn path={'customer'} />
      </Grid>
      <HorizontalLayout theme="margin" className="self-end">
        <Button theme="primary" onClick={() => (newReservationDialogOpened.value = true)}>
          New reservation
        </Button>
      </HorizontalLayout>
      <Dialog
        headerTitle={'New reservation'}
        opened={newReservationDialogOpened.value}
        onOpenedChanged={({ detail }) => {
          newReservationDialogOpened.value = detail.value;
        }}
        footer={
          <>
            <Button onClick={closeNewReservationDialog}>Cancel</Button>
            <Button theme="primary" disabled={invalid} onClick={submit}>
              Add
            </Button>
          </>
        }>
        <VerticalLayout style={{ alignItems: 'stretch', width: '18rem', maxWidth: '100%' }}>
          <TextField label="ID" {...field(model.id)} />
          <DatePicker label="Date" {...field(model.date)} />
          <TextField label="Customer" {...field(model.customer)} />
        </VerticalLayout>
      </Dialog>
      <Notification
        theme="warning"
        duration={0}
        position="middle"
        opened={subscriptionNotificationOpened.value}
        onOpenedChanged={(event) => {
          subscriptionNotificationOpened.value = event.detail.value;
        }}>
        <HorizontalLayout theme="spacing" style={{ alignItems: 'center' }}>
          <div>{subscriptionNotificationMessage.value ?? 'Failed to subscribe to reactive reservation endpoint'}</div>
          <Button theme="tertiary-inline" style={{ marginLeft: 'var(--lumo-space-xl)' }} onClick={retrySubscription}>
            Retry
          </Button>
          <Button theme="tertiary-inline icon" onClick={closeSubscriptionNotification} aria-label="Close">
            <Icon icon="lumo:cross" />
          </Button>
        </HorizontalLayout>
      </Notification>
    </VerticalLayout>
  );
}
We add a new Dialog component that contains a form to create a new reservation. The form is build using the useForm hook from Hilla. It provides all the necessary props and functions for things like validation, submitting and clearing the form (please check out the corresponding guide in the docs for more details). The onSubmit callback will call the produce method of the KafkaProducerService using the validated reservation that was entered in the form.
Manual testing
Now it’s time to see the additions in action. Ensure that the Kafka broker is running (docker compose -f docker/docker-compose.yaml up), start the Hilla app (for example with ./mvnw spring-boot:run) and visit http://localhost:8080 in your browser. Click the New reservation button below the Grid component and add a new reservation in the form in the dialog.
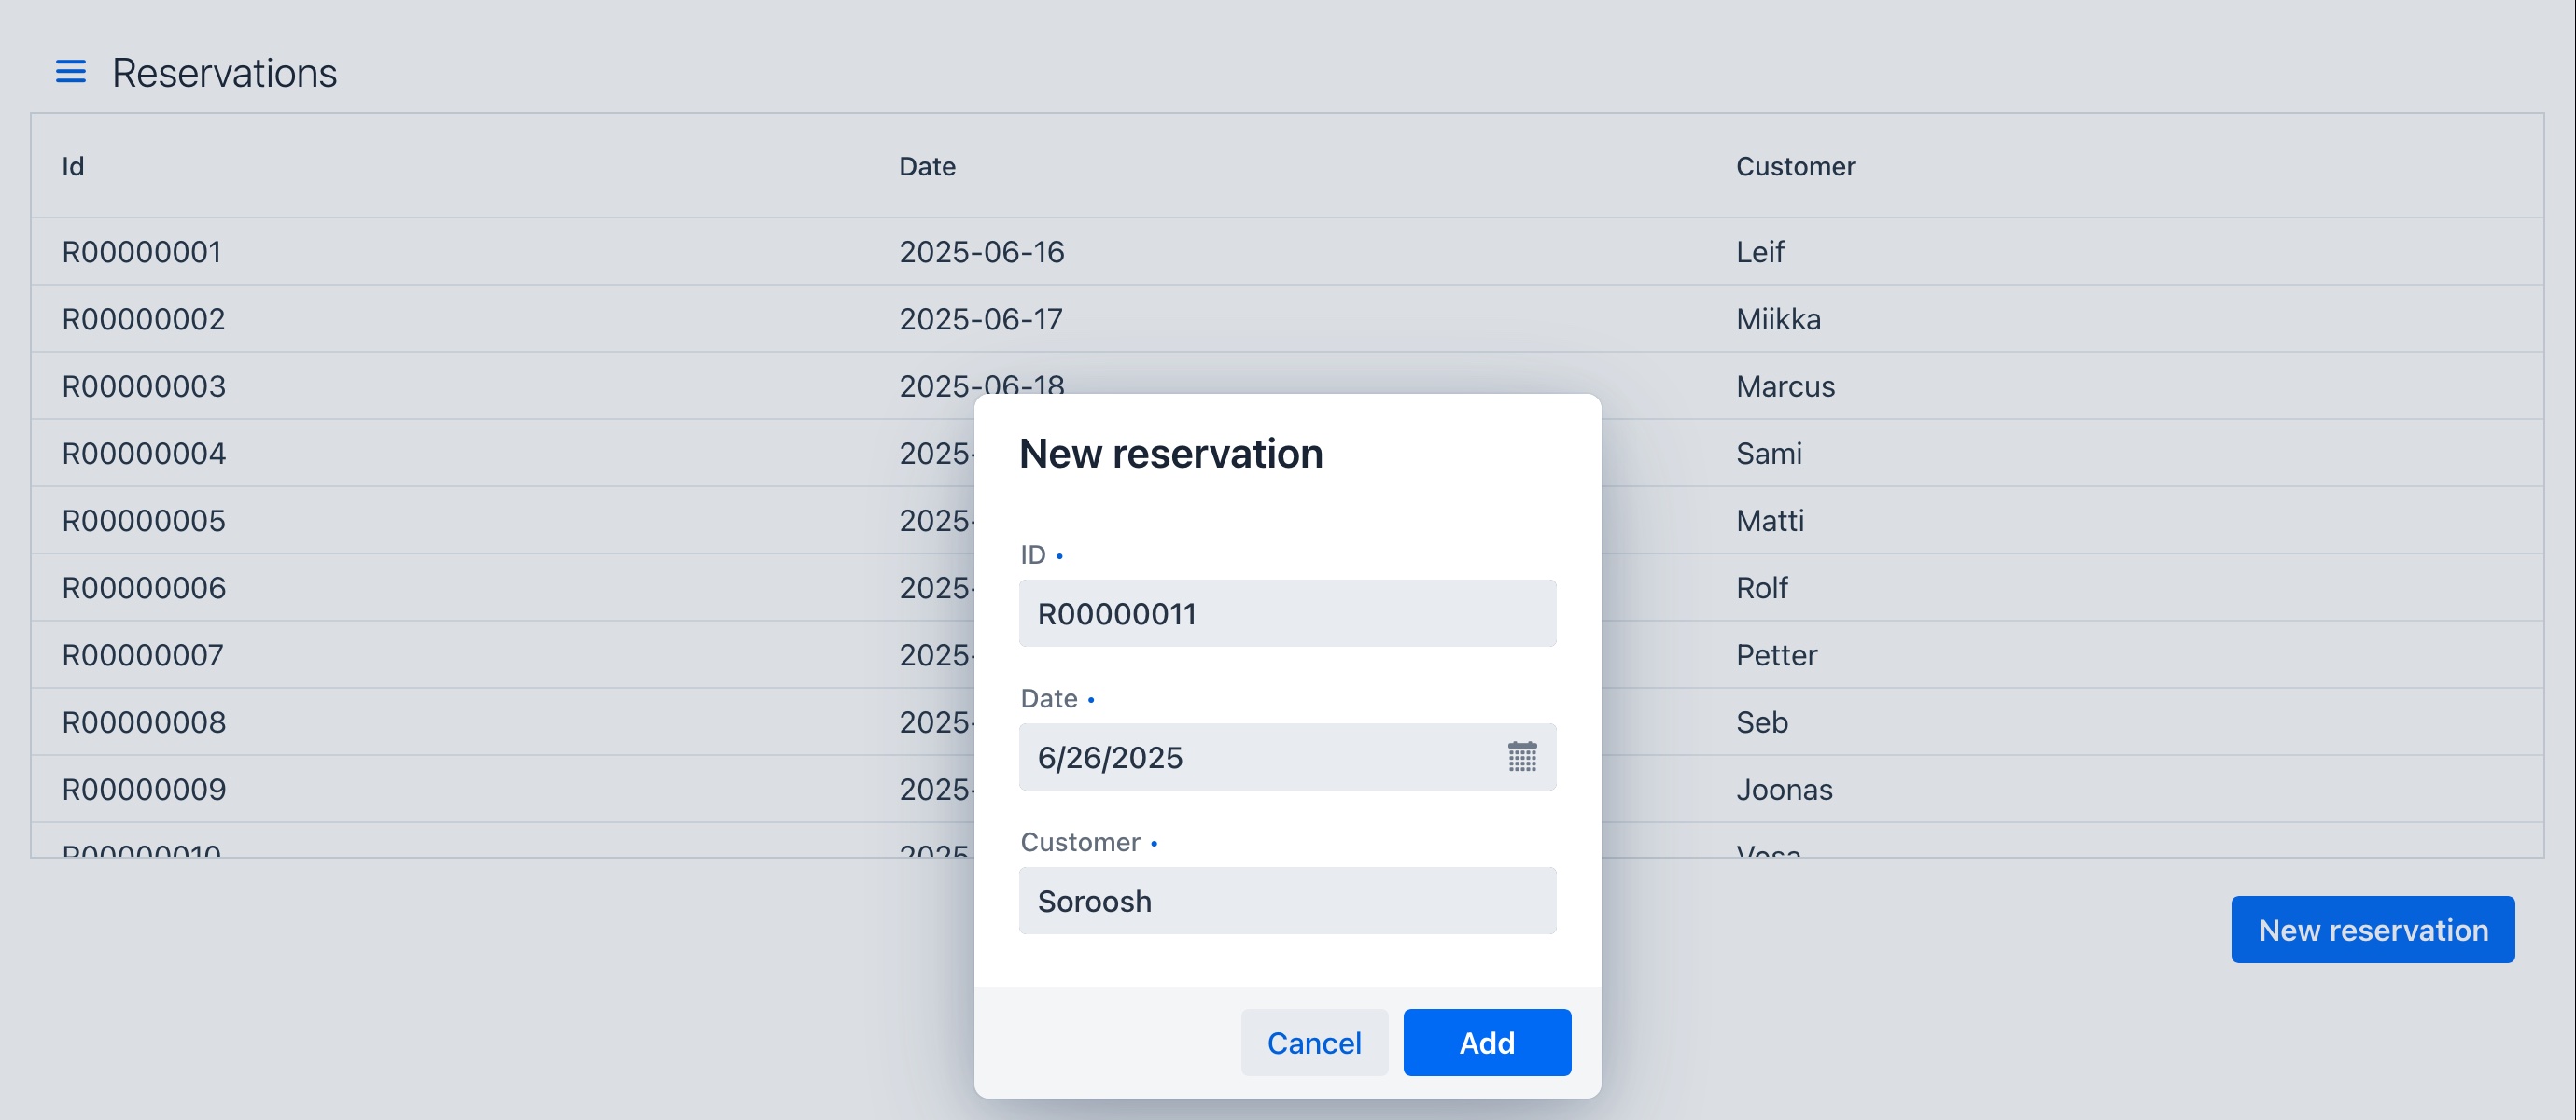
The submitted reservation should appear immediately in the Grid component, once the dialog has been closed.
Summary
Thanks to Spring Kafka and Spring Boot’s auto-configuration capabilities, it’s simple to add a new message to a Kafka topic. In conjunction with Hilla’s type-safe browser callable services and first-class form support, the necessary additions to the frontend are also easy to implement.
The next article of this series will show how to utilize Kafka Streams in web apps build with Hilla.
You can find the source code of the shown example Hilla app at GitHub.
Image Credits:
- Cover image source: https://www.flickr.com/photos/mgaylard/54106964166
- Cover image license: https://creativecommons.org/licenses/by/2.0/deed.en